In WordPress build a multi-step form is very easy. The multi-step form is looking user friendly than a long page form.
A multi-step form means split forms into many parts as you want. These types of online forms attract your visitors in different ways. Also, this will helps you to increase engagement and improve the user experience.
So, in this article, we will show you how to build multi-step online forms in WordPress.
Here is some example websites of multi-step forms.
Why is a Multi-Step online form
Multi steps form not a different kind of form, you can convert your existing form into a multi-step form. Users can not see the length of your form. They can see the next step of your form after filling the first step. So users feel that your forms are short and sweet.
Some visitors are lazy to fill the long forms. So, in this scenario, these multi-step forms help you to user fill your form without fail.
Watch this video for a quick learn
Step 1: Create a Form in WordPress
First, you need to install and activation of WPForms pro for build a multi-step online form in WordPress.
In addition, if you are fresher to install a WordPress plugin, so, read our article on how to install a WordPress plugin? This article will guide you to through.
Right after the install and activation of the WPForms Pro plugin, click on add new from the menu bar under WPForms. Add a name to your newly created form (ex: Multi-step form). Then select any premade templates from below.

In addition, for the best result create a long-form. The long-form is best for multi-step forms.
Here i am selecting the donation form. You can select any one as you want or create a blank form. This multi step form suitable for a sign up forms.
Step 2: Split Your Form into two Parts or more
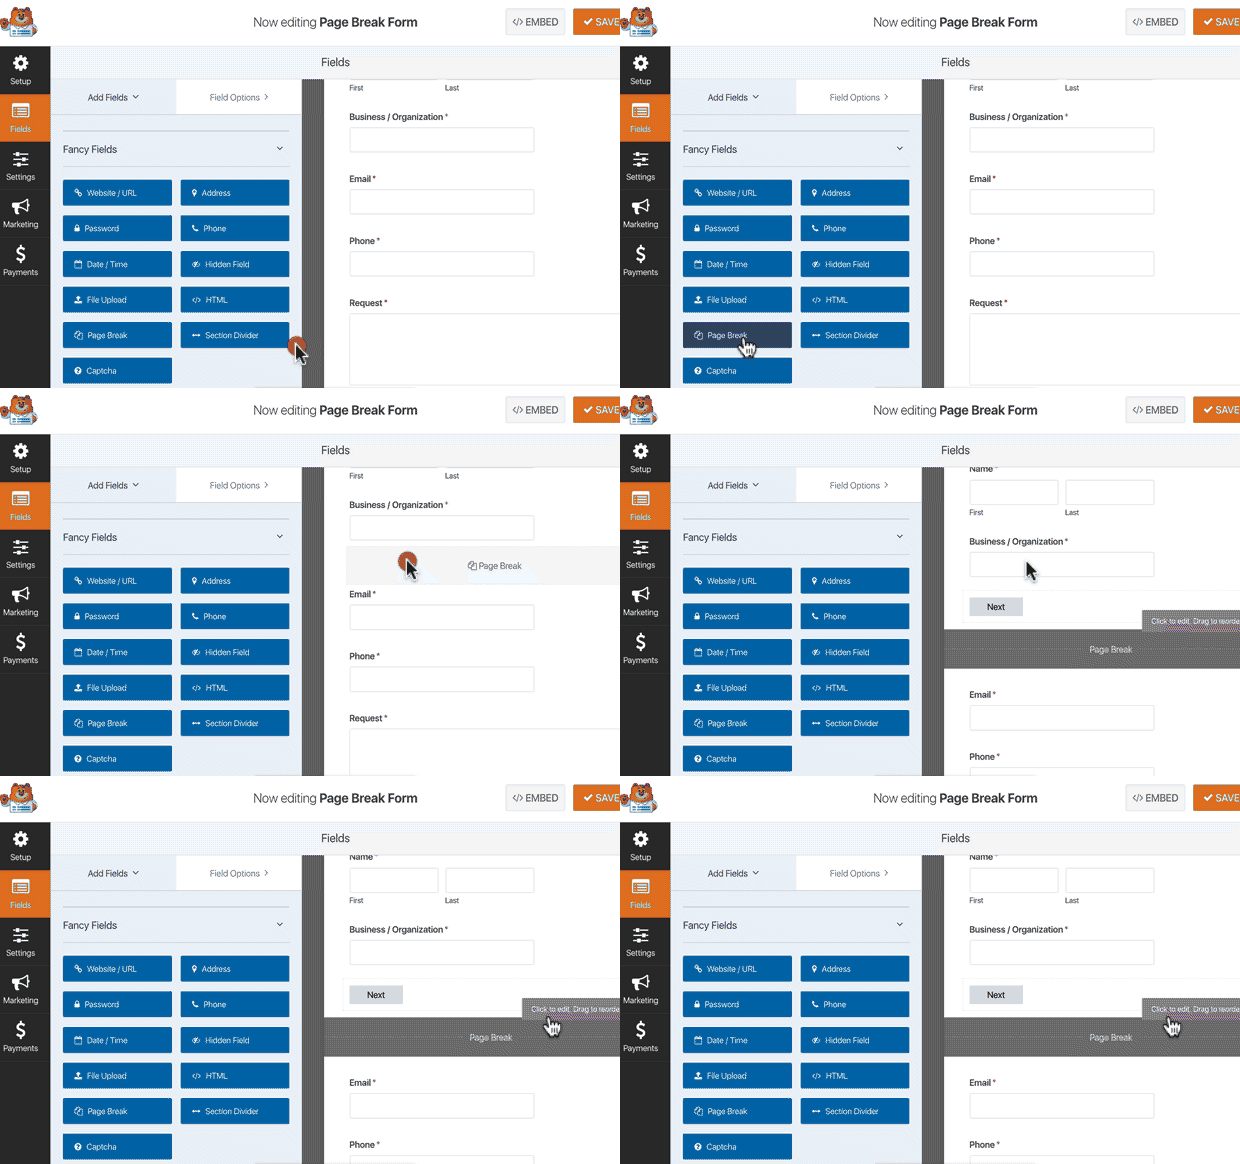
Once your form created, now you can split your form as many parts as you want. For this, you just drag the “page break” field to the form builder area.
Keep in mind, WPForms have a drag and drop interface to create any kind of form. You no need to know any coding language.

You can add this field any were in to builder area as you want.
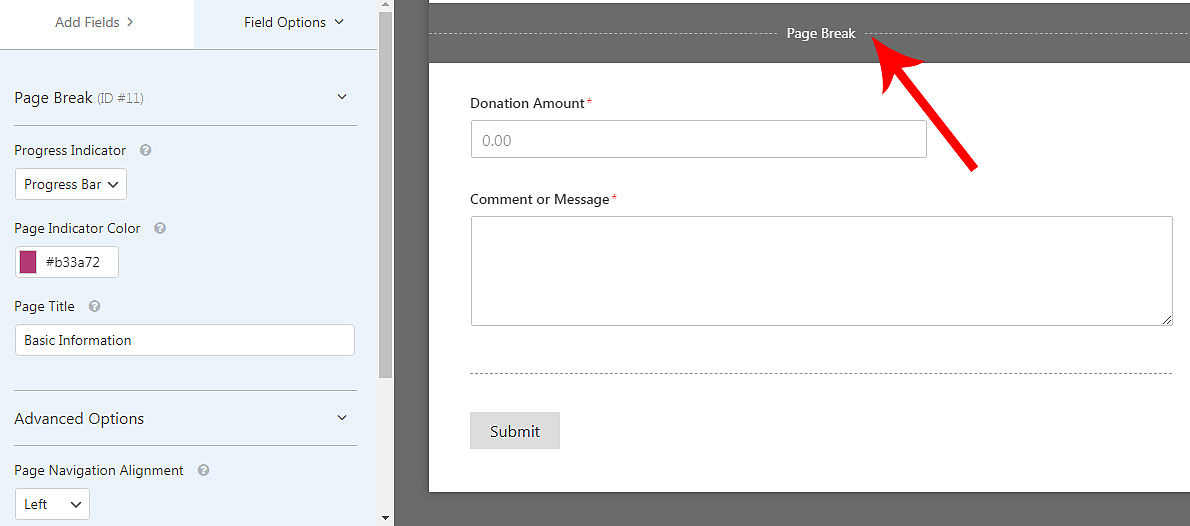
In addition, the fields after the “page break” will appear in the next step of your live form.
Step 3: Customize the Progress Bar of your multi-step form
This is final step of build a multi-step form in wordpress
Further more, you can customize your multi-step forms progress bar. When a user comes to your form, he want to know how many sections are there on your form. So, this will help him to decide to how long does it take.
So, WPForms comes with three different breadcrumb style indicator bars.
- Connectors: shows a connecting bar and page titles of each part of your multi-step form.
- Circles: shows one circle and page title per page on your multi-step form.
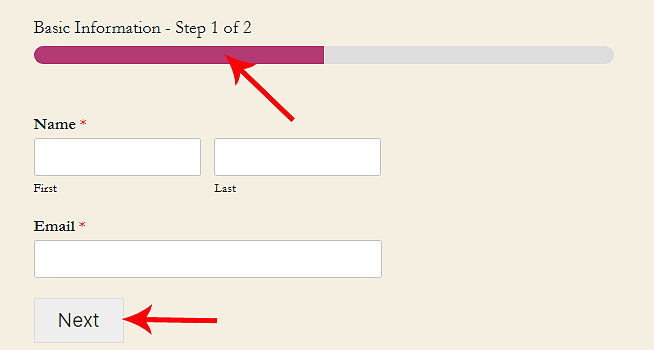
- Progress Bar: indicates the progress of the form as the user fills it out.
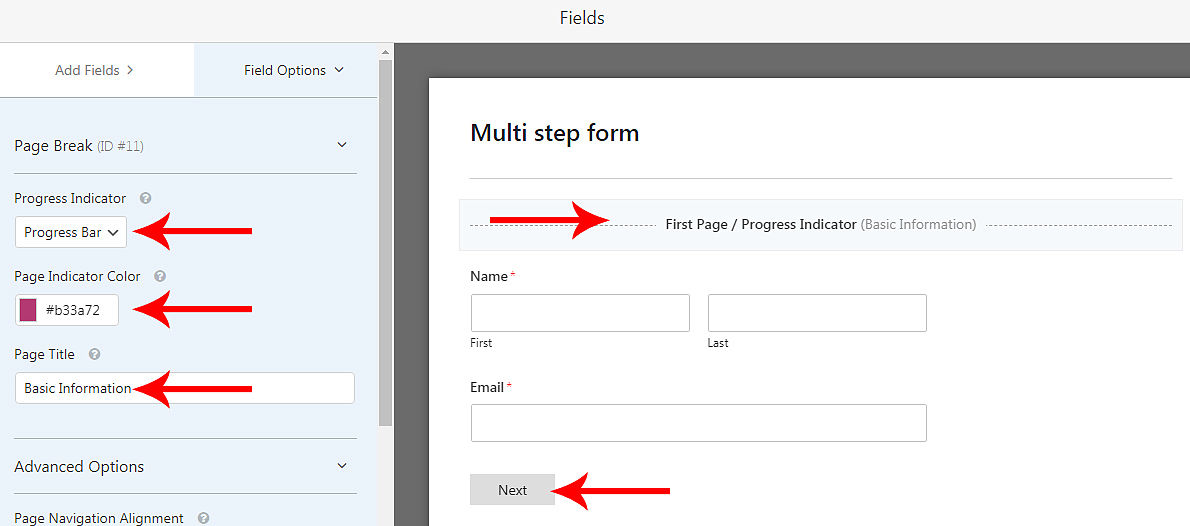
Here keep in mind you can see the “First page” labeled field at the top of your multi-step form. This will come only after you add a page break field to your form. And also a next page labeled button will appear at the bottom of every page.
Also, from the filed options you can select any kind of Progress Indicator. Here you can see the progress indicators from the drop-down.
Also, you can edit the first page as you want. And also edit the next page liable to any as you want. Do edit for maintain your website brand.


If you add two or more page breaks to your form, then you can see the previous button on your fields options area. When you select on page break then you see the both “previous and next” button text in the fields options area.
Here you can activate or deactivate the previous button. So, the user can see the previous button when they fill the form and if they want to make any changes in the previous part they can go back.

Step 4: Configure Your Form Settings
Finally, don’t forget to Configure Your Form Settings. Here you can configure three options such as General, Notifications, and Confirmations
General: Here you can change the form name, add a description, customize the submit button, and other.
Notifications: In Notifications, you can add a new notification to a visitor. This is actually he gets a personalized message after he/she completes form submission. This one helps to let them know you received their submission. Go here to know more about personalized notifications.
Confirmations: Once site visitors complete your form, you can show them a message right after on the same page, take site visitors to another page on your website, or redirect visitors to another website. This is an instant step for visitors to confirm that their form has been submitted.
Here you can add a new message or configure the existing one. For the best experience for visitors, you can add a suitable message for your multi-step form here.

Step 5: Add Your Form to Your Website
Once you complete the create a survey online form, now add it to a page or post.
To begin, create a new page or post, then click on the new block button, search WPForms on search box select newly created multi-step form from the drop-down, now the multi-step form placed automatically, and now publish the post.


![How To Create an Engaging Multi-Page Form [Step-by-Step]](https://wpwebsmartz.com/wp-content/uploads/2020/11/How-To-Create-an-Engaging-Multi-Page-Form-Step-by-Step.jpg)


